Illumination • $155.49
Streamlight ProTac HL-X
- ✓1,000 lumens
- ✓50,000 candela
$97.99$155.49Save 37%
View at Amazon
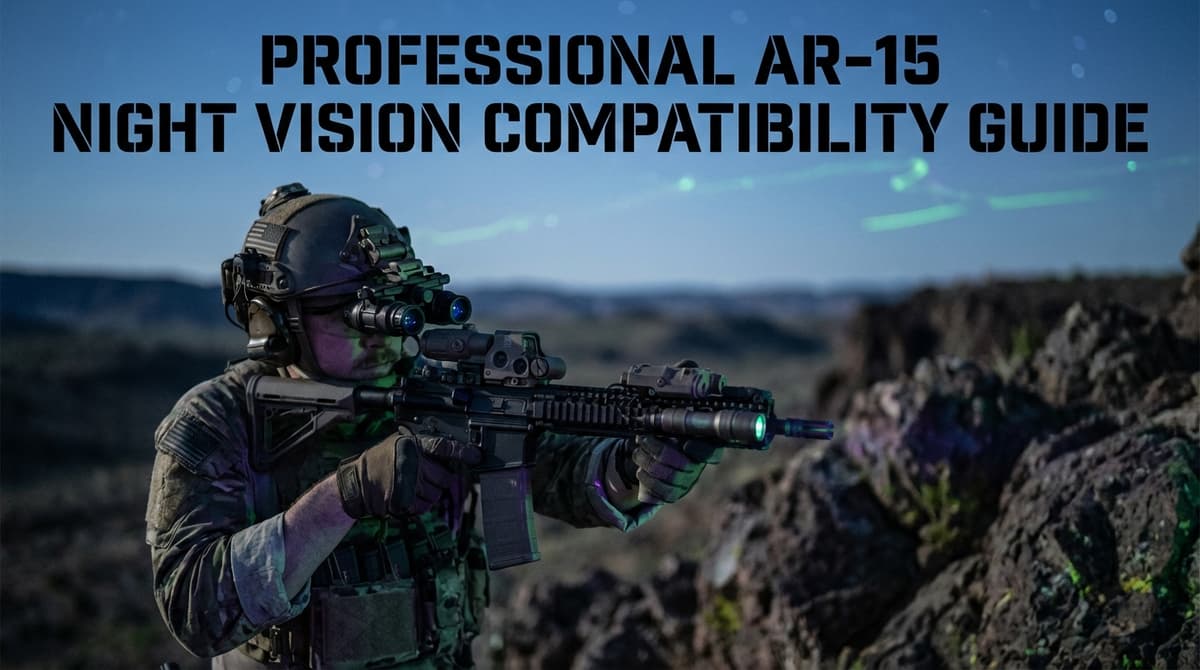
Complete AR-15 night vision compatibility guide. Setup IR lasers (PEQ-15, DBAL), passive aiming, optic mounting heights (1.93", 2.26"), and NVG training requirements for low-light operations.
Affiliate links (?)
Compare NVG setup configurations, optic mount heights, IR laser devices, and passive aiming strategies. Night vision capability requires careful component selection, proper mounting, and dedicated training to maintain proficiency.
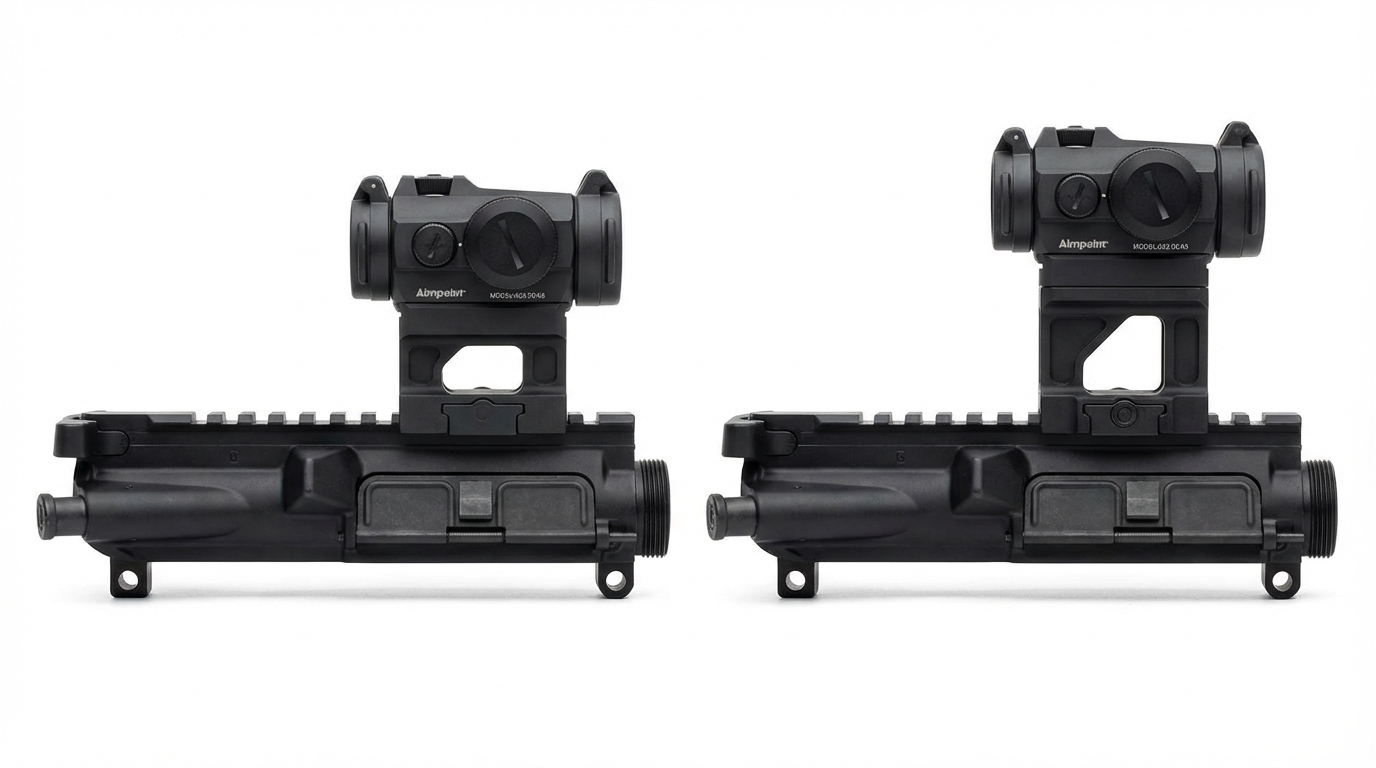
Mount height:Use lower 1/3 cowitness (1.70"–1.93") for NVG builds. Provides proper helmet clearance and natural head position. Avoid absolute cowitness.
Passive aiming first: Start with a red dot or holographic sight that remains visible under NVGs. Add IR laser/illuminator later if mission requires.
IR devices: Budget users can run passive-only. Duty/tactical users benefit from full-power IR laser + illuminator (MAWL, DBAL, Holosun IRIS) for precision aiming and target ID in total darkness.
Home defense and general-purpose builds benefit from passive-aimable optics (red dots, holographic sights) that remain visible under NVGs without IR laser activation. Magnified optics are problematic due to eye relief and reticle visibility issues.
Duty and tactical users pair passive optics with dedicated IR laser/illuminator devices for precision aiming and target ID in total darkness. Requires training and zero maintenance.
Lower 1/3 cowitness or taller mounts provide NVG helmet clearance and natural head position. Absolute cowitness mounts feel cramped under tubes and should be avoided for dedicated NVG builds.
Sling, light, backup sights, and QD mounts, the upgrades most builders add first.
Affiliate links (?)
Each setup balances passive aiming capability, active IR illumination, battery life, and training complexity. Choose based on mission requirements and budget.
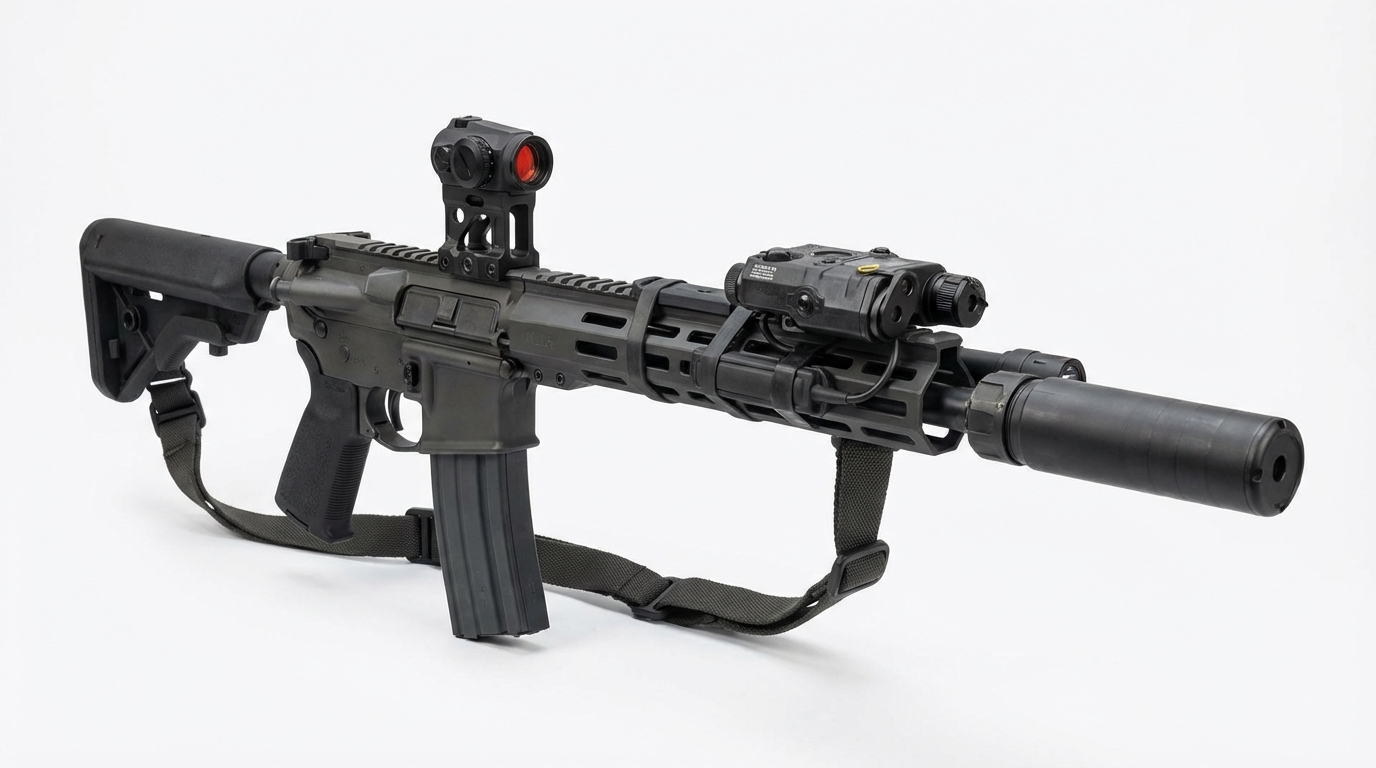
Traditional NVG setup combining a passive-aimable optic (red dot or holographic) with a dedicated IR aiming laser and illuminator.
Gold standard for serious NVG work. Prioritize quality IR devices (Steiner, L3Harris, B.E. Meyers) over budget options—cheap lasers drift zero and fail under recoil. Lower 1/3 cowitness provides better NVG helmet clearance than absolute cowitness mounts. Red dots and holographic sights perform equally well under NVGs. If you need daylight magnification, add a flip-to-side magnifier—it stows completely out of the way for night operations.
NVG-compatible optic (red dot or holographic) with high-output white light for target ID, relying on passive aiming under NVGs without IR laser.
Ideal for home defense where positive ID with white light is non-negotiable. Passive optics work well in suburban environments with streetlights or moonlight. Consider a pressure pad for the white light to keep activation instant.
Dedicated IR laser device as the primary aiming method, bypassing traditional optics entirely.
Higher complexity requires more training and maintenance
Only recommended for advanced users with formal training in laser-only aiming techniques. Backup irons or a red dot should still be present for emergency passive aiming. Most users should not adopt this method without professional instruction.
Mount height directly affects NVG helmet clearance, head position, and sight-over-bore offset. Lower 1/3 cowitness is the default for modern NVG-capable builds.
Minimal NVG clearance
Recommendation: Avoid for dedicated NVG builds. Use only for rifles where NVGs are an occasional add-on.
Good NVG clearance
Recommendation: Default choice for any AR-15 with NVG capability. Balances passive aiming, helmet clearance, and daylight use.
Maximum NVG clearance
Recommendation: Best for dedicated NVG users with bulky tube setups or those preferring heads-up ergonomics. Not ideal for general-purpose builds.
IR laser and illuminator devices range from mil-spec full-power units to budget civilian models. Choose based on mission requirements, budget, and legal restrictions. New dual-spectrum options like the Meprolight STING Lumina are entering the mid-tier bracket. For detailed device comparisons and rankings, see our best IR illuminator for AR-15 guide. For a handheld thermal scanner to pair with an NVG setup, see the Vortex Veil 400 thermal monocular.
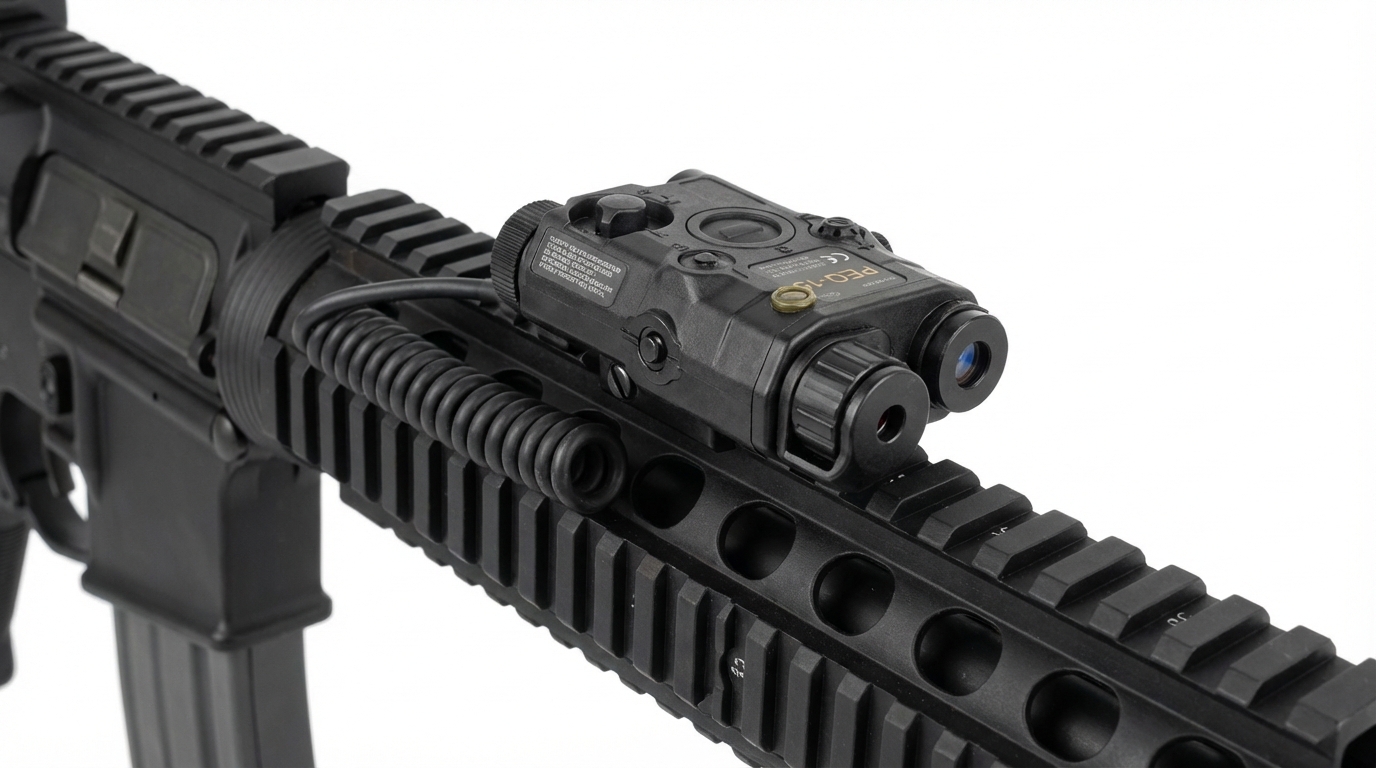
Examples: PEQ-15, DBAL-A3, MAWL-C1+, LA-5/PEQ
Mil-spec devices with high-power IR lasers (visible at 300+ yards) and adjustable illuminators. Extremely durable but expensive. Restricted to military/LE in some jurisdictions. Best for serious duty use.
Examples: Steiner DBAL-I2, Holosun LS321, ATPIAL-C
Compliant civilian versions with reduced IR laser power. Still effective for most uses under 100 yards. More affordable than full-power units. Good for training and home defense NVG setups.
Examples: Streamlight TLR-VIR II, Surefire X400V-IRC
Weapon lights with visible laser and IR illuminator. No IR laser aiming capability. Best for users who want illumination and visible laser but don't need IR aiming. More affordable entry point.
Examples: Surefire Vampire Scout, Streamlight ProTac Rail Mount HL-X IR
No laser—just IR illumination for low-light navigation and target ID. Pair with passive-aimable optic. Most affordable way to add active IR to a build. Limited to close range due to lack of laser aiming.
Match your primary mission or environment to a recommended NVG setup. These guidelines prioritize capability, training complexity, and budget.
Prioritize positive target ID with white light. Passive optic (red dot or holographic) works well in suburban ambient light. No need for expensive IR laser at close range.
Proven configuration for mixed lighting conditions. IR laser handles low-light precision. Passive optic provides backup. Lower 1/3 mount balances NVG and daylight use.
Extended sightlines benefit from a flip-to-side magnifier for daylight precision. Stow the magnifier for night operations. IR laser handles low-light aiming with passive optic backup.
Speed and instinctive aiming outweigh precision. IR laser enables awkward-position shooting. Passive optics work well for traditional aiming backup.
Simplifies setup for users learning NVG skills. No expensive IR laser required. Passive aiming builds fundamentals before advancing to laser techniques.
Lowest-cost entry to NVG-capable rifles. Passive optic handles most aiming. Budget IR illuminator (Surefire Vampire) adds active lighting without laser cost.
The mount height, IR laser, and optic pairing decisions on this page only matter once the right PVS-14 is on the helmet. Tube spec, phosphor, autogating, and FOM drive that buy. Skip Gen 2+ unless the use case is once-a-year curiosity; the AGM 3AL3 at $2,895 is the cheapest autogated Gen 3 worth running, and the Licentia 24UA at $4,999 is the floor on a unit worth building real helmet and mount hardware around. The full ranked tier breakdown is in the PVS-14 buyer's guide.
Lower 1/3 cowitness (1.70"–1.93") is the default for NVG builds. Provides excellent helmet clearance and natural head position. Avoid absolute cowitness unless you rarely use NVGs.
Choose an optic that remains visible under NVGs: red dots and holographic sights both work well. This provides a backup if IR laser fails and simplifies training for new users. Avoid magnified optics for NVG use due to eye relief and reticle visibility issues.
Duty users and serious NVG operators benefit from IR laser/illuminator devices for precision aiming and target ID. Budget users can skip this initially and add later if mission demands evolve. See our IR illuminator guide for detailed device comparisons and recommendations. For the helmet, mount, counterweight, and comms side of the NVG stack, see our best ballistic helmets and helmet setup guide.
NVG shooting requires dedicated training to build proficiency. Zero both optic and IR laser, practice passive aiming, and maintain equipment. Most users should take formal instruction before relying on NVGs for defense.
Ready to build a complete platform? Open the guided assistant to evaluate firearms, optics, and accessories with compatibility checks and mission-focused recommendations.
Affiliate links - purchases support this site at no extra cost to you. (?)
Avid shooter with 9+ years of experience including competition shooting. Built 10+ AR-pattern rifles and several handgun platforms for home defense, competition, and suppressed night shooting.
This page contains affiliate links. Purchases through these links support the site at no extra cost to you. Read the affiliate disclosure
Ready to continue? Here's the recommended next guide:
Best clip-on thermal optics for AR-15 compared against dedicated thermal scopes: Pulsar Krypton 2 and SIG ECHO CV25, plus dedicated alternatives like AGM Rattler V3 and Bering Super Yoter. Mounting guide, zero workflow, clip-on thermal vs dedicated scope, and NVG/red dot compatibility.
Or explore a related topic:
AR-15 Suppressor Setup 2026->Continue exploring with these related resources
Prism scopes use an etched glass reticle that stays crisp for astigmatic eyes where a red dot starbursts. Here are the best AR-15 prism optics in 2026, from the $265 Primary Arms 1x MicroPrism to the ELCAN SpecterDR, plus the holographic alternative for astigmatism.
Learn proper AR-15 optic mounting with practical steps for eye relief, rail placement, threadlocker application, torque specs, and accessory positioning for repeatable zero.
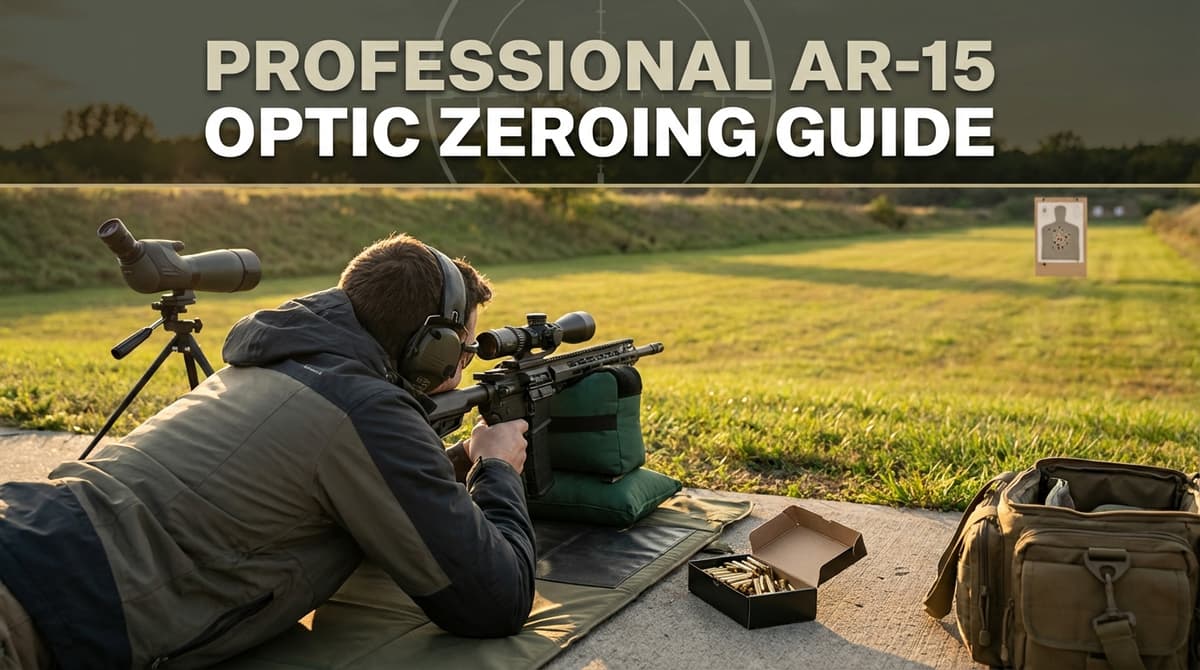
How to zero an AR-15 red dot, LPVO, or iron sights. Step-by-step with 50/200 zero chart, printable targets, 25-yard confirmation method, clicks calculator, and mechanical offset explained.
Related articles and industry updates
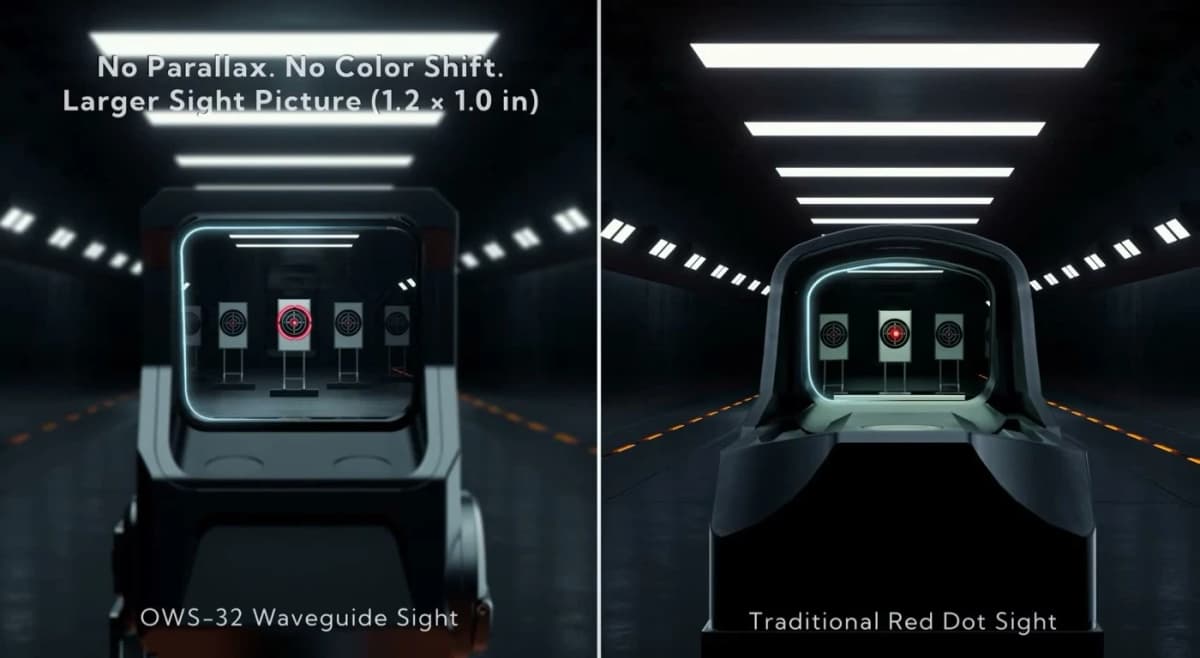
INFITAC debuts the OWS-32 optical waveguide sight at NRAAM 2026 Houston: a 1.26 x 1.0 inch window, seven user-selectable reticles, 1500-hour CR123A runtime, IP67 waterproof to 33 ft, and zero forward light signature. Positioned as a third category beyond red dot and holographic.
Partner-feed checked Memorial Day 2026 deals worth shopping before Monday, May 25: BattleHawk rifle bundles, Faxon Summer Kick-Off pricing, OpticsPlanet coupon codes, Federal 9mm case ammo, Holosun optics, Radian AR parts, and practical build accessories.
Primary Arms expands the CLx line with four new optics shipping mid-June 2026: the RD-23 push-button red dot ($149.99), Enclosed Reflex Sight with AutoLive ($179.99), 1x Prism with Circle Dot reticle ($199.99), and 3x Prism with 5.56 Cross Dot reticle ($219.99). All carry the lifetime warranty.