Red dots · 1.57" / 1.93"
Scalarworks LEAP/07 LPVO Mount
- ✓QD throw lever with auto-tension
- ✓Both standard and NV-friendly heights available
$399.00 MSRP
View at OpticsPlanet
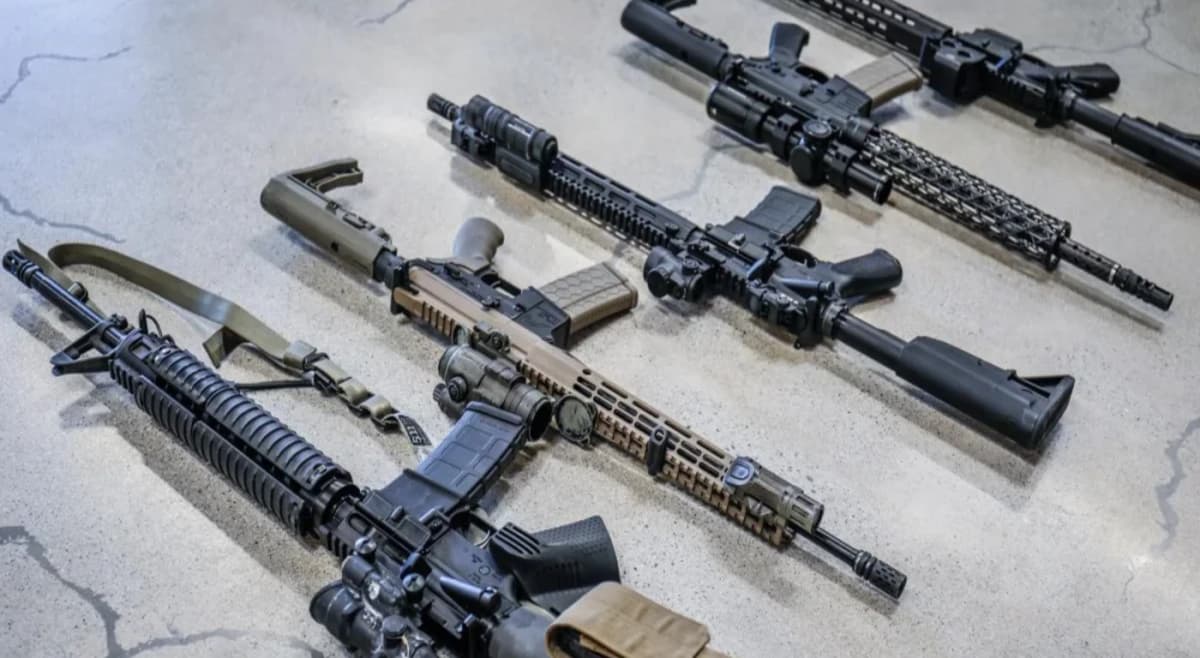
Learn proper AR-15 optic mounting with practical steps for eye relief, rail placement, threadlocker application, torque specs, and accessory positioning for repeatable zero.
A practical walkthrough for mounting red dots, LPVOs, and prisms on an AR, plus where to place lights and lasers on the rail. Focused on repeatable zero: correct hardware, torque, and threadlocker habits.
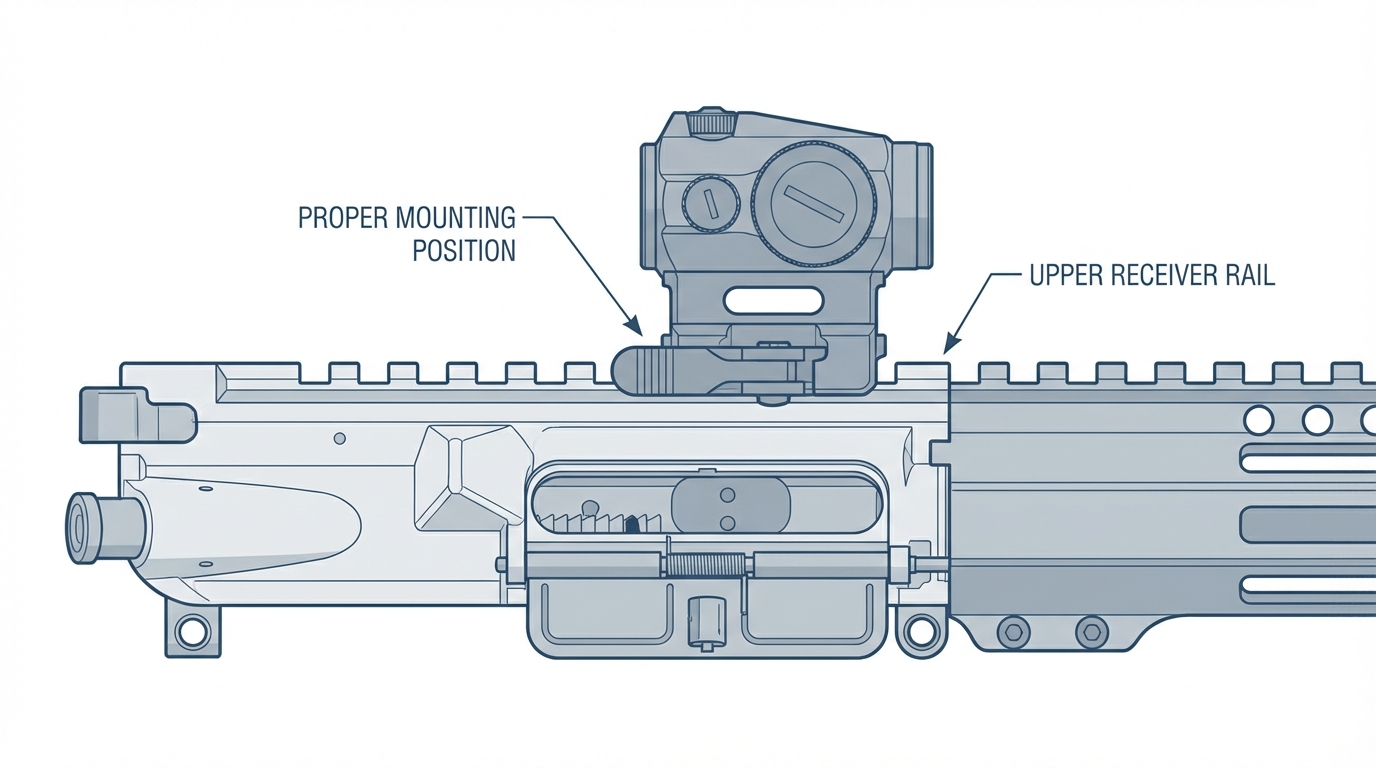
Location matters: Mount optics entirely on the upper receiver, never bridging onto the handguard. Handguards flex and shift under heat and pressure, causing zero loss.
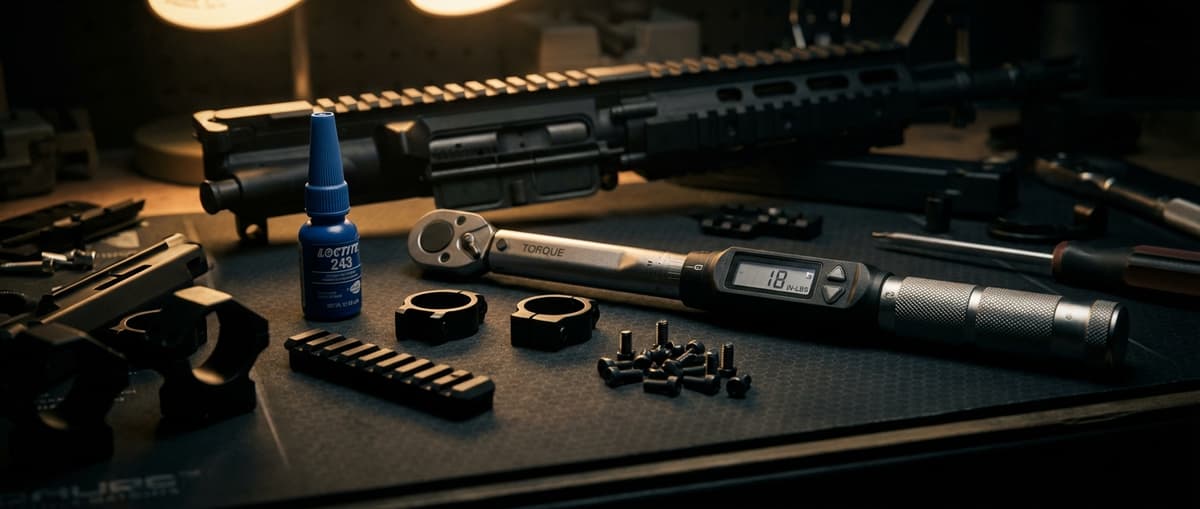
Torque and threadlocker: Use a calibrated inch-pound torque wrench and blue threadlocker. Follow manufacturer specs (typically 15-30 in-lb for rings). Paint-pen witness marks to catch movement.
Eye relief for scopes: Set scope position at maximum magnification in your actual shooting gear. Level the reticle, tighten rings in X pattern evenly. Re-check after first range session.
A clean, stable setup makes mounting safer and more repeatable. Treat this like an armorer task, not a quick accessory install.
Red dots are the simplest optics to mount, but sloppy hardware habits still cause lost zeros. Think about height, eye position, and rail engagement before tightening anything. Still choosing a sight? Our best AR-15 red dot picks and the optic selection guide cover red dot vs LPVO vs prism before you commit to a mount height.
LPVOs and traditional scopes demand more attention to eye relief and reticle level. Rushing this step leads to neck strain and awkward head positions under stress. Start with the right mount: our best LPVO and AR-15 scope mounts guide ranks cantilever and QD mounts by height, tube diameter, and return to zero.
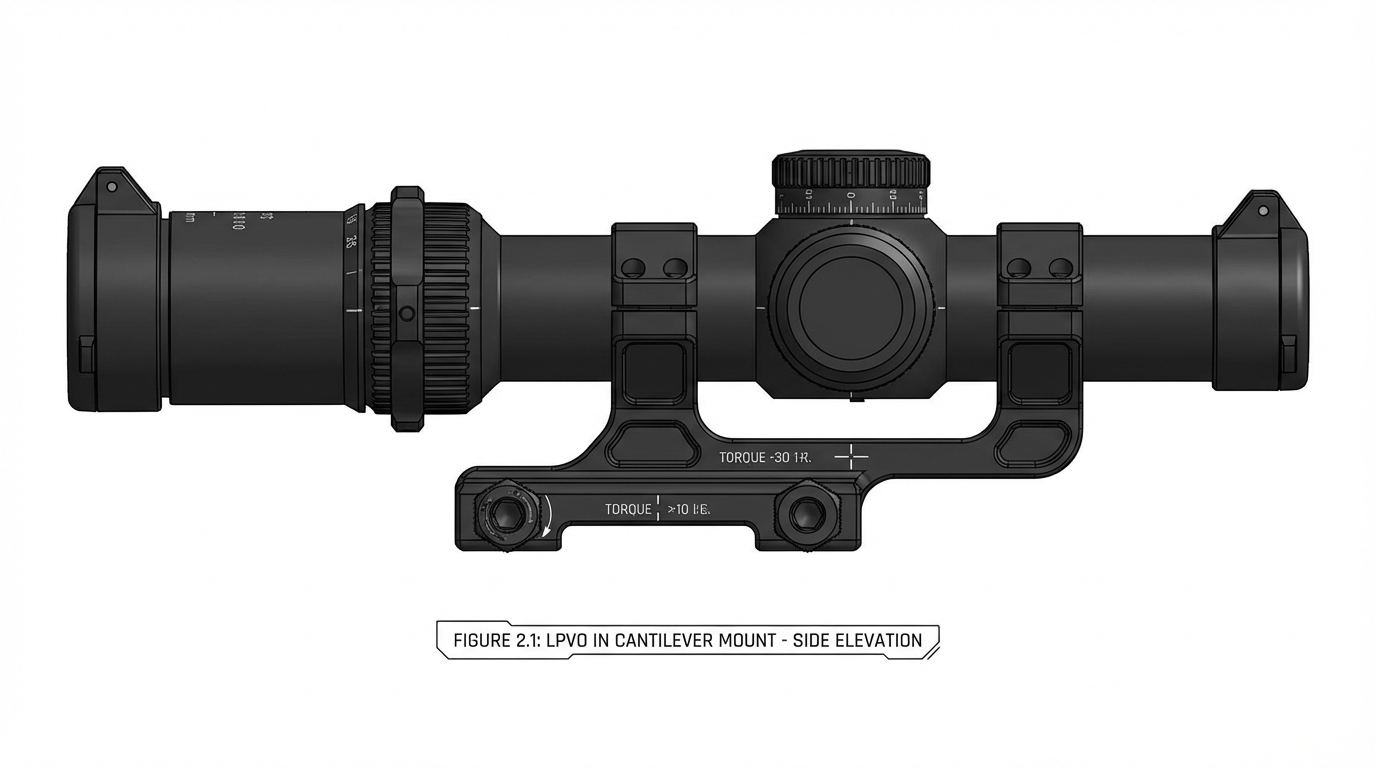
After tightening, re-check eye relief and level in your actual gear. If anything feels strained or tilted, loosen in small steps, adjust, and re-torque.
Fixed prisms mount similarly to red dots but with a defined eye box. Respect that eye box and you get fast, clear hits from 0–300+ yards.
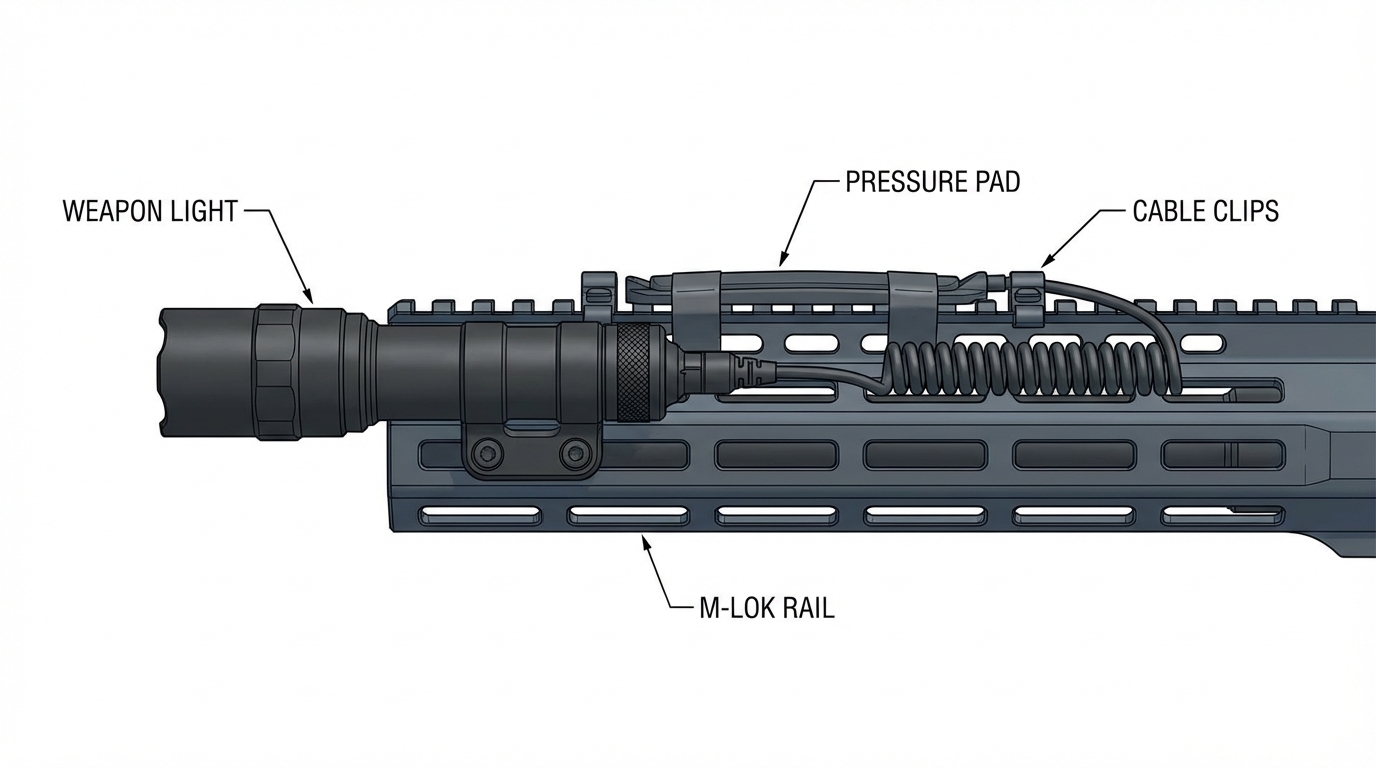
White lights and lasers round out the upper. The goal is a clean activation path that doesn't fight your grip or block your optic.
Proper torque and threadlocker use keep mounts from loosening at the worst time. Over-torquing can crush scope tubes or strip screws; under-torquing lets zeros walk.
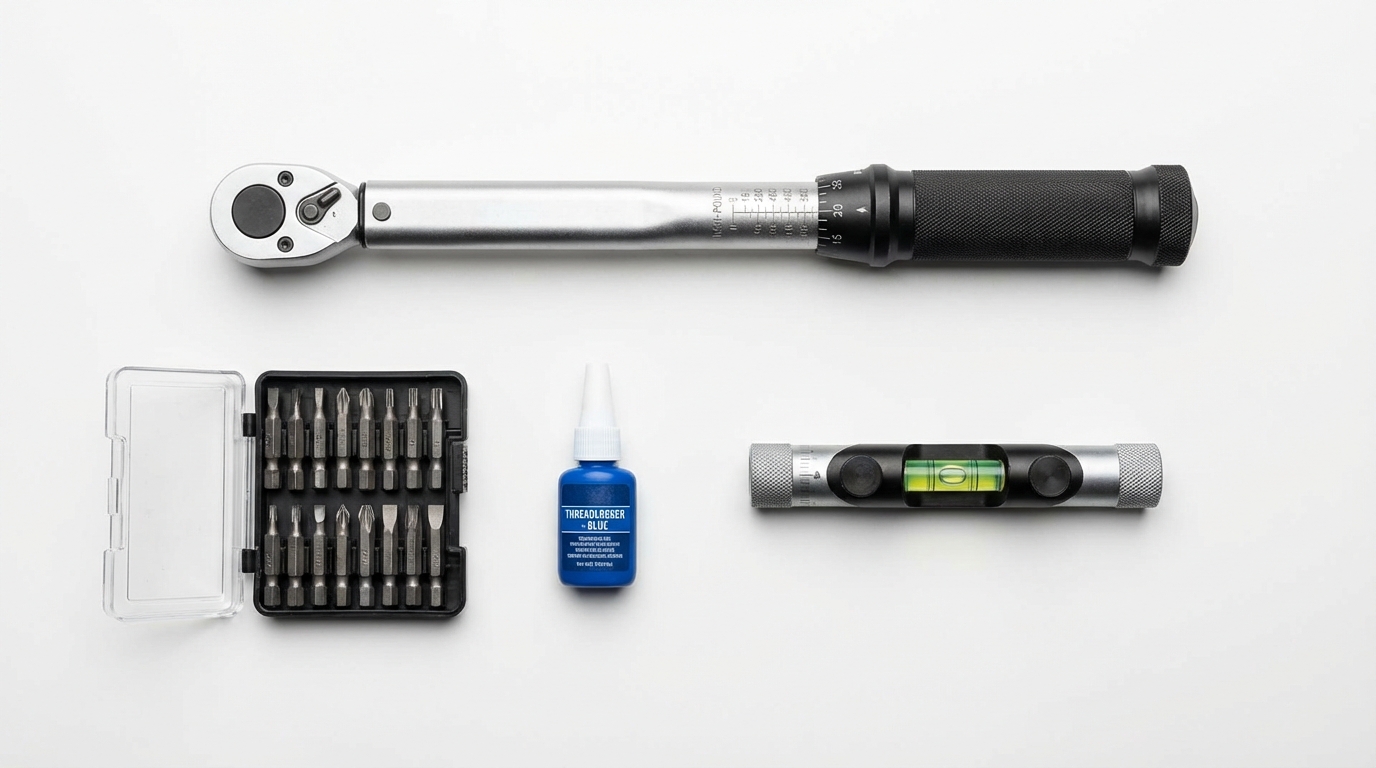
Log torque values, threadlocker use, and any mount changes in your maintenance or armorer notes so you can trace point-of-impact shifts back to specific hardware changes.
Affiliate links - purchases support this site at no extra cost to you. (?)
Two-level kit for aligning a bolt-action rifle receiver and scope before tightening ring screws.
Always follow the specific torque values from your optic manufacturer.
Affiliate links - purchases support this site at no extra cost to you. (?)
Before heading to the range, confirm screws are torqued, threadlocker has cured, and accessories clear your sling and barricades. Zero the rifle from realistic positions using our AR-15 zeroing guide, then re-check torque and witness marks after your first live-fire session. Catching a loose screw on the bench is cheaper than discovering it in a match or emergency.
Sling, light, backup sights, and QD mounts, the upgrades most builders add first.
Affiliate links (?)

Avid shooter with 9+ years of experience including competition shooting. Built 10+ AR-pattern rifles and several handgun platforms for home defense, competition, and suppressed night shooting.
This page contains affiliate links. Purchases through these links support the site at no extra cost to you. Read the affiliate disclosure
Ready to continue? Here's the recommended next guide:
How to zero an AR-15 red dot, LPVO, or iron sights. Step-by-step with 50/200 zero chart, printable targets, 25-yard confirmation method, clicks calculator, and mechanical offset explained.
Continue exploring with these related resources
A single vetted mid-tier AR-15 build for the buyer stepping up from a budget rifle. Part-by-part picks for a ~$1,000-1,300 rifle that runs a class without babysitting, with a running cost tally, why each slot beats the budget pick, and a separate optic add-on tier.
A single vetted upper-mid-tier AR-15 build, part by part, that lands around $1,991 for the rifle before optic. BCM complete lower and upper, Daniel Defense BCG, Geissele SSA-E trigger, and a Radian Raptor, with a running cost tally and a callout for where this tier stops short of full Gucci.
Prism scopes use an etched glass reticle that stays crisp for astigmatic eyes where a red dot starbursts. Here are the best AR-15 prism optics in 2026, from the $265 Primary Arms 1x MicroPrism to the ELCAN SpecterDR, plus the holographic alternative for astigmatism.
Related articles and industry updates
Partner-feed checked Memorial Day 2026 deals worth shopping before Monday, May 25: BattleHawk rifle bundles, Faxon Summer Kick-Off pricing, OpticsPlanet coupon codes, Federal 9mm case ammo, Holosun optics, Radian AR parts, and practical build accessories.
Primary Arms expands the CLx line with four new optics shipping mid-June 2026: the RD-23 push-button red dot ($149.99), Enclosed Reflex Sight with AutoLive ($179.99), 1x Prism with Circle Dot reticle ($199.99), and 3x Prism with 5.56 Cross Dot reticle ($219.99). All carry the lifetime warranty.
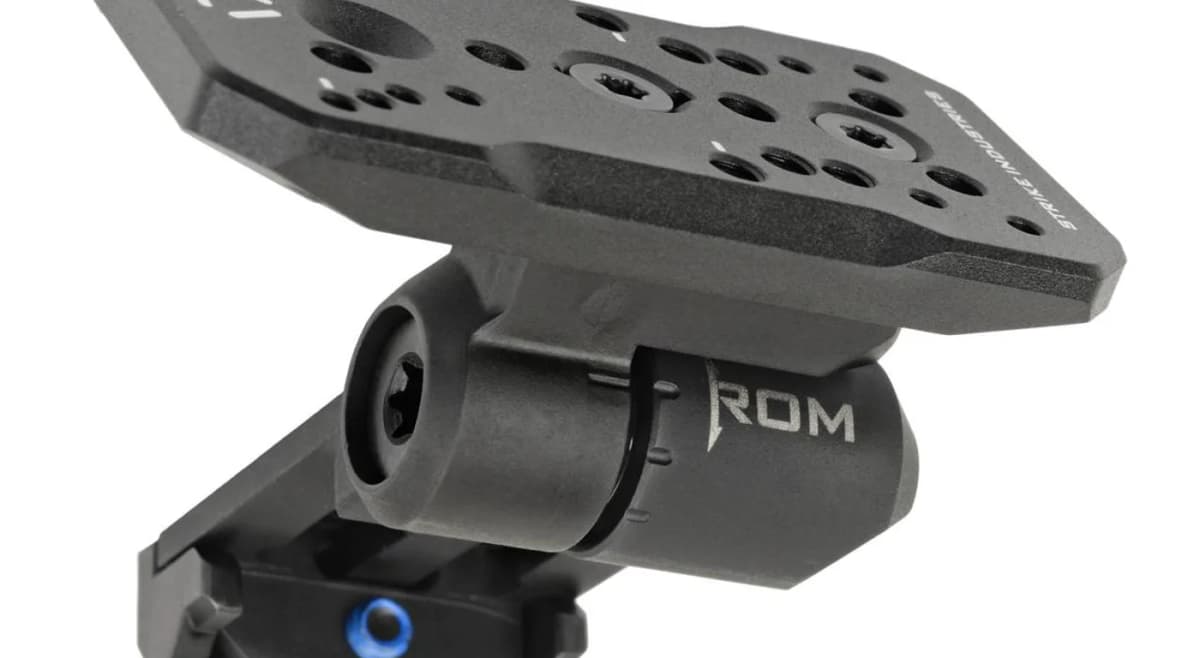
Strike Industries launches the SI-ROM Rotatable Optic Mount: a 3.22 oz CNC steel offset mount with 120° of rotation, dual Aimpoint Micro and SI Multi-Optic footprints, ambidextrous left/right mounting, and compatibility with 30+ red dots including the RMR, SRO, 507C, and 508T. MSRP $89.95.