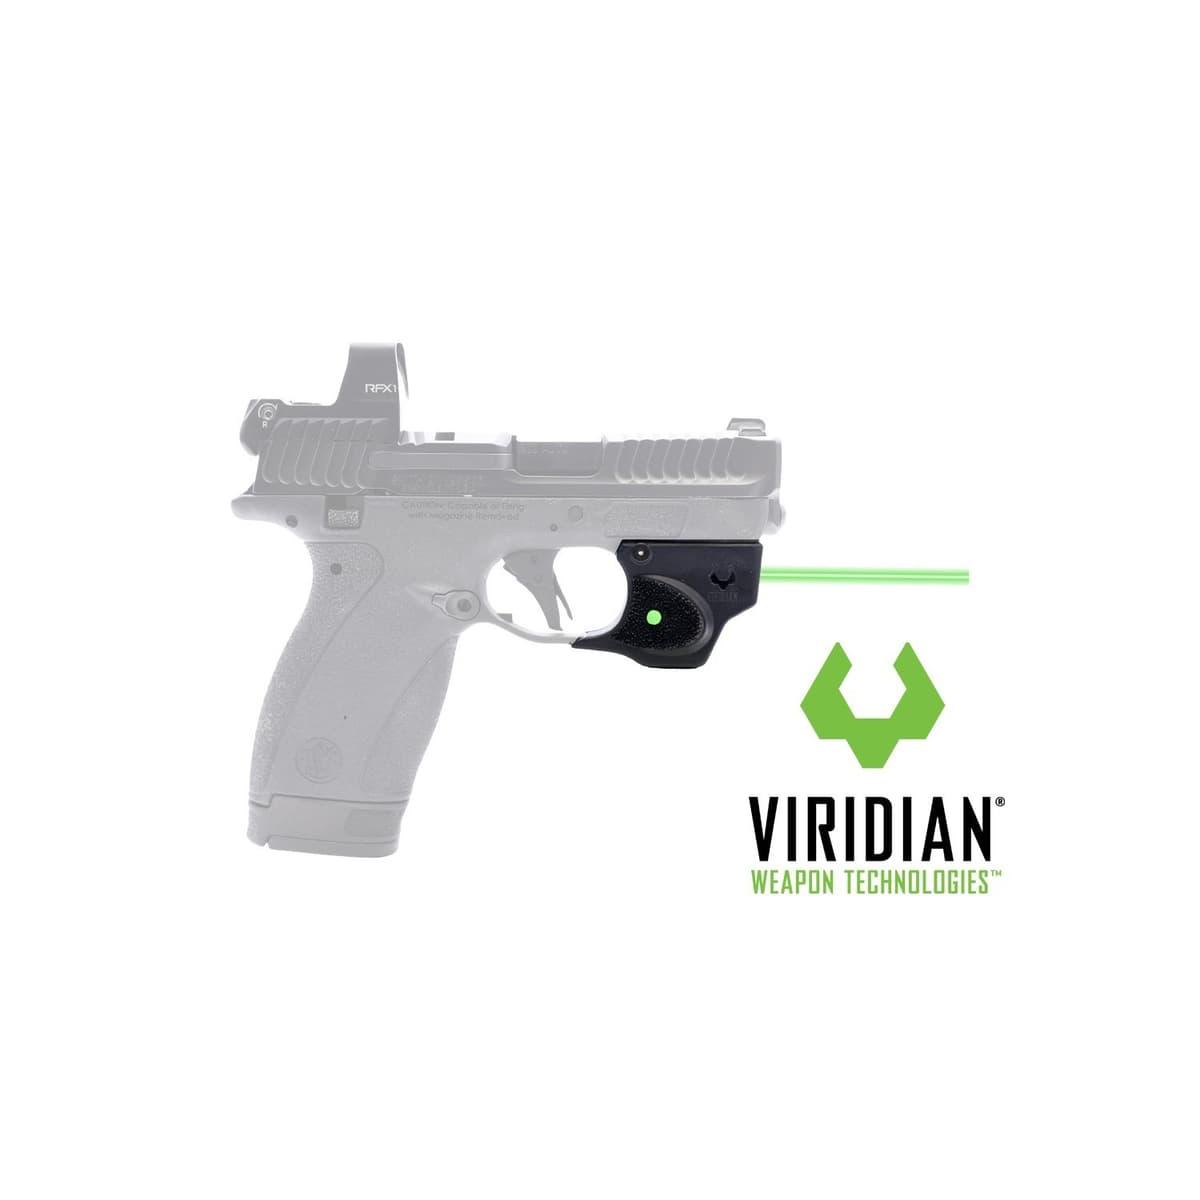
Viridian E-Series Green Laser (S&W Bodyguard 2.0)
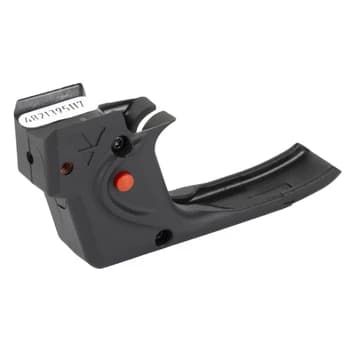
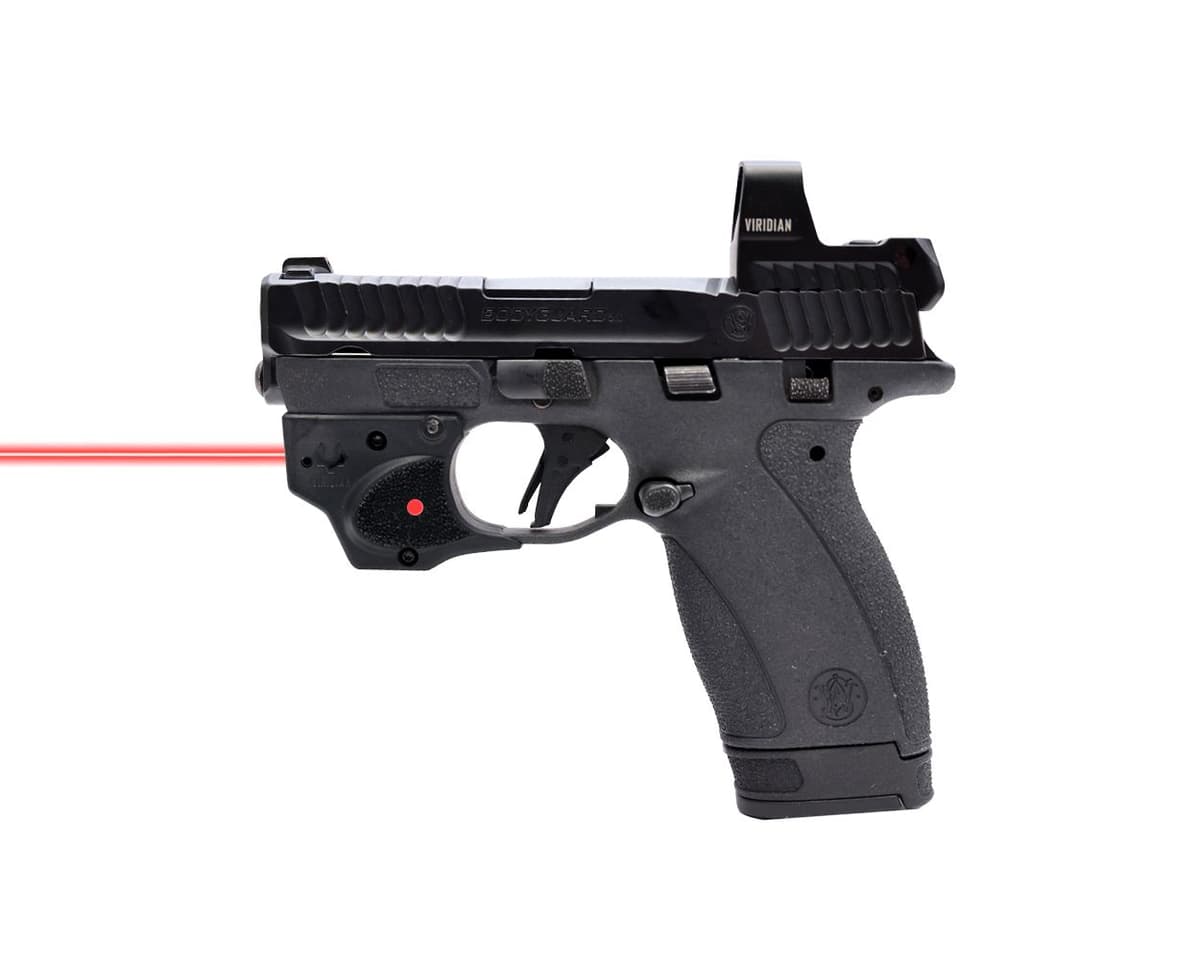
Daylight-visible green version of the custom-fit trigger-guard laser for the S&W Bodyguard 2.0, installed by swapping the factory takedown pin for the supplied roll pin.
- Price
- $149
- Weight
- 1 oz
- Brand
- Viridian
- Category
- Lasers
Featured in

Features
- •Green laser, visible in bright daylight
- •Trigger guard mount, no rail required
- •Installs via factory pin swap
- •Purpose-built Bodyguard 2.0 shell
Capability Boosts
Recommended For
+14 more
Where to Buy
Compare current prices and availability from retailers we work with.
Viridian Weapon Technologies E-Series Green Laser Sight, Smith & Wesson Bodyguard 2.0, Black, 912-0101
Price History
90-day low $121.79 · at low nowMore pistol guides & articles
Guides



Pros
- +Green beam stays visible in bright daylight, unlike the red E-Series
- +Custom-fit shell mounts to the Bodyguard 2.0 with no rail or gunsmithing
- +Trigger-guard mount preserves the slim pocket profile
- +Replaces the factory takedown pin cleanly, fully reversible
Cons
- −Costs more than the red E-Series for the same shell
- −Bodyguard 2.0 only, the shell will not fit any other firearm
- −Adds a small amount of bulk around the trigger guard, confirm pocket-holster fit
Setup & Operation
Step-by-step procedures for setting up, operating, and maintaining the Viridian E-Series Green Laser (S&W Bodyguard 2.0).
Separate the Housing and Install the 1/3N Battery
The E-Series is a two-piece clamshell that closes around the trigger guard, and the battery lives inside it. That means a cell change is a partial disassembly rather than a door, so the same sequence covers both the first install and every battery swap afterward.
One screw is not a mounting screw. Viridian calls it out in capital letters: do not remove the windage or elevation screw while you have the housing apart. Pulling that screw loses the factory zero and there is no way to index it back by eye.
- • One CR1/3N 3 volt battery (one is included)
- • The supplied housing screw tool
- 01
Unload the pistol and drop the magazine
Make sure the firearm is unloaded and the magazine is removed. Follow the clearing procedure in the Bodyguard 2.0 manual and confirm the chamber is empty before the housing comes apart.
- 02
Remove the mounting screws only
Separate the laser housing by removing the mounting screws. Do not remove the windage or elevation screw.
- 03
Set the laser side over the trigger guard
Slide the laser side of the E-Series housing over the trigger guard and snap it into place. On the Bodyguard 2.0 fitment, the unit is retained by swapping the pistol's factory pin for the roll pin supplied in the box.
- 04
Install the cell positive end toward the spring
Insert the included 1/3N battery into the battery compartment, positive end toward the contact spring. Polarity is the most common reason a freshly assembled E-Series does nothing.
- 05
Hook the opposite half into the locking groove
Hook the opposite side of the housing into the laser side at an angle by inserting it into the locking groove at the rear of the unit, then apply pressure to the front from both sides to join the housing together.
- 06
Install the screws without overtightening
Install the screws. Viridian's note is explicit: do not overtighten. This is a polymer housing, and a stripped boss is not a repairable part.
The CR1/3N is a coin cell and an ingestion hazard. A swallowed cell can cause internal chemical burns in as little as two hours, and Viridian's warning states that death or serious injury can occur. Keep new and used cells out of reach of children and seek immediate medical attention if one is swallowed. Do not force discharge, recharge, disassemble, heat above 140 F, or incinerate the battery.
Zero the Laser to Your Point of Impact
Viridian ships every E-Series laser factory-sighted, and the manual is blunt about what that means: do not touch windage or elevation before you have confirmed point of aim through the iron sights. Most units need nothing.
When you do adjust, the direction convention is the same on both axes. Clockwise moves the laser up on the up/down adjustment and right on the left/right adjustment; counter-clockwise moves it down and left. Viridian suggests setting the zero somewhere between 21 feet and 25 yards, which brackets the realistic distance a pocket pistol gets used at.
- • Supplied windage and elevation adjustment tool
- • Target with a clearly visible aiming point
- 01
Unload and make the weapon safe
Clear the pistol before any adjustment work. Viridian repeats this as both the first and the fifth step of its own procedure, because the adjustment happens between live strings.
- 02
Set up a target
Set up a target with a clearly visible aiming point at the distance you want as your zero. Viridian suggests somewhere between 21 feet and 25 yards.
- 03
Confirm point of aim through the irons first
Align the laser to the iron sights of the pistol at your chosen zero distance. Do not adjust windage or elevation before confirming point of aim through the iron sights; the unit ships factory-sighted and most of the time the factory setting is correct.
- 04
Fire a shot group using the laser
Load and fire a shot group at the target using the laser as your aiming reference, not the irons. Then unload and make the weapon safe again before touching the adjustments.
- 05
Walk the laser into the group
Adjust windage and elevation so the center point of the laser coincides with the group. Clockwise on the up/down adjustment moves the laser up and counter-clockwise moves it down; clockwise on the left/right adjustment moves it right and counter-clockwise moves it left.
Always make sure the firearm is clear and on safe before making windage or elevation adjustments. The adjustment tool puts your hand directly in front of the muzzle.
Use the On/Off Switch and the 5-Minute Auto Shut-Off
The E-Series carries a single on/off switch with a five-minute automatic shut-off, so the laser cannot be left running in a pocket holster until the cell is dead. The ambidextrous switch sits at the front of the trigger guard where either index finger reaches it without entering the guard.
The green diode runs modulated rather than continuous wave, which is part of why it reads as brighter to the eye than its 5 mW rating suggests.
Viridian's own warning is that the activation control exists so you can run the laser without putting a finger inside the trigger guard. Keep your finger off the trigger and outside the guard until you intend to fire, and test the unit periodically during long stretches of non-use so you know it still works when you need it.
Clean the Lens, Housing, and Contacts
Gun powder residue on the front lens degrades the aiming point before it ever kills the unit, so periodic lens cleaning with a moistened cotton swab is the one maintenance item that actually matters on this laser. The exterior takes a soft damp cloth, and standard gun cleaning solvents are acceptable on stubborn areas of the housing.
Electrical contacts get a cotton swab dipped in alcohol. For heavy build-up, carefully rub the contacts with a standard pencil eraser and then remove every trace of eraser residue.
Do not use acidic or flammable cleaning compounds, and do not operate the laser around cleaning solvents or flammable materials. There are no user serviceable parts in the E-Series beyond the battery, and opening or modifying the housing voids the warranty, as does removing the serial number from the unit.
Apply the Supplied Laser Warning Label
The compliance label for the green E-Series ships loose in the box rather than applied to the unit, and Viridian marks its installation as important rather than optional. It goes on the firearm, not on the laser housing.
Do it during the install while the instruction sheet is still out, because the label is the part everyone loses first.
- • The supplied laser warning label
- 01
Orient the arrow toward the aperture
Install the supplied laser warning label on the firearm with the Laser Aperture arrow pointing toward the laser aperture.
- 02
Check the label matches your unit
The green label reads: Output power under 5 mW, wavelength 510 to 532 nm, emission type Modulation with a pulse duration of 3.0 plus or minus 0.6 microseconds, and a beam diameter under 3 mm at the aperture, Class 3R/IIIa product. Confirm the label in your box is the one for the diode color you bought.
This is a Class 3R/IIIa laser product. Direct eye exposure can cause temporary or permanent eye damage. Do not stare into the beam, do not look into it through binoculars or telescopes, do not point it at mirror-like surfaces, and do not shine it into or near anyone's eyes. Do not point the laser at any person, animal, or moving vehicle, including aircraft. Use of controls or adjustments or performance of procedures other than those specified in the manual may result in hazardous radiation exposure.
Detailed Specifications
- laserType
- Green
- mount
- Trigger guard, factory pin swap to supplied roll pin
- fitment
- S&W Bodyguard 2.0 only
- installation
- Drop-in, no rail required
Pairs Well With
Top matches
Similar Products
Compatible Platforms
Compatibility Tags
Build Your Custom Configuration
Add the Viridian E-Series Green Laser (S&W Bodyguard 2.0) to your build and see how it enhances your platform.